check out our brand new website and logo - still under a little development, as always we welcome any comments.
www.beechwoodhandyman.com

 |
| First stage is working out where the skylights will go, I used a few odd pieces of insulation to ensure that they looked right in the room before I stated. |
 |
| Once your happy with the location, the one truss needs to be removed, make sure that its cut as square as you can. |
 |
| Sorry can't easily rotate the image in my Blog editor, any suggestions? Once the truss has been removed you need to add support for the missing truss and also add additional support for the skylight, take extra and make sure the 4 sides are square and the right size. |
 |
| This is the moment of truth, once you cut a hole in your roof your committed!! I double checked all my measurements before I got my recip saw out. As I spent time making sure the opening was square and the right size, cutting the hole only takes a few minutes. |
 |
| Next step is to cut the shingles approx 2 1/2 inches around the perimeter so the skylight can sit flush on the roof. |
 |
| Rather than using the galvanised nails supplied I used deck screws to secure the skylight, make sure the skylight is square before you start nailing / screwing. You can see the blue marks I scribed on the roof before the skylight went in place, makes it much easier to centralise the unit. The blue marks show the corners of the cut out. |
 |
| Image from inside the loft room with the two skylights fully installed, sorry I didn't show any details of the flashing install, once I was on the roof I wanted to get the job done and my camera was on the inside. |
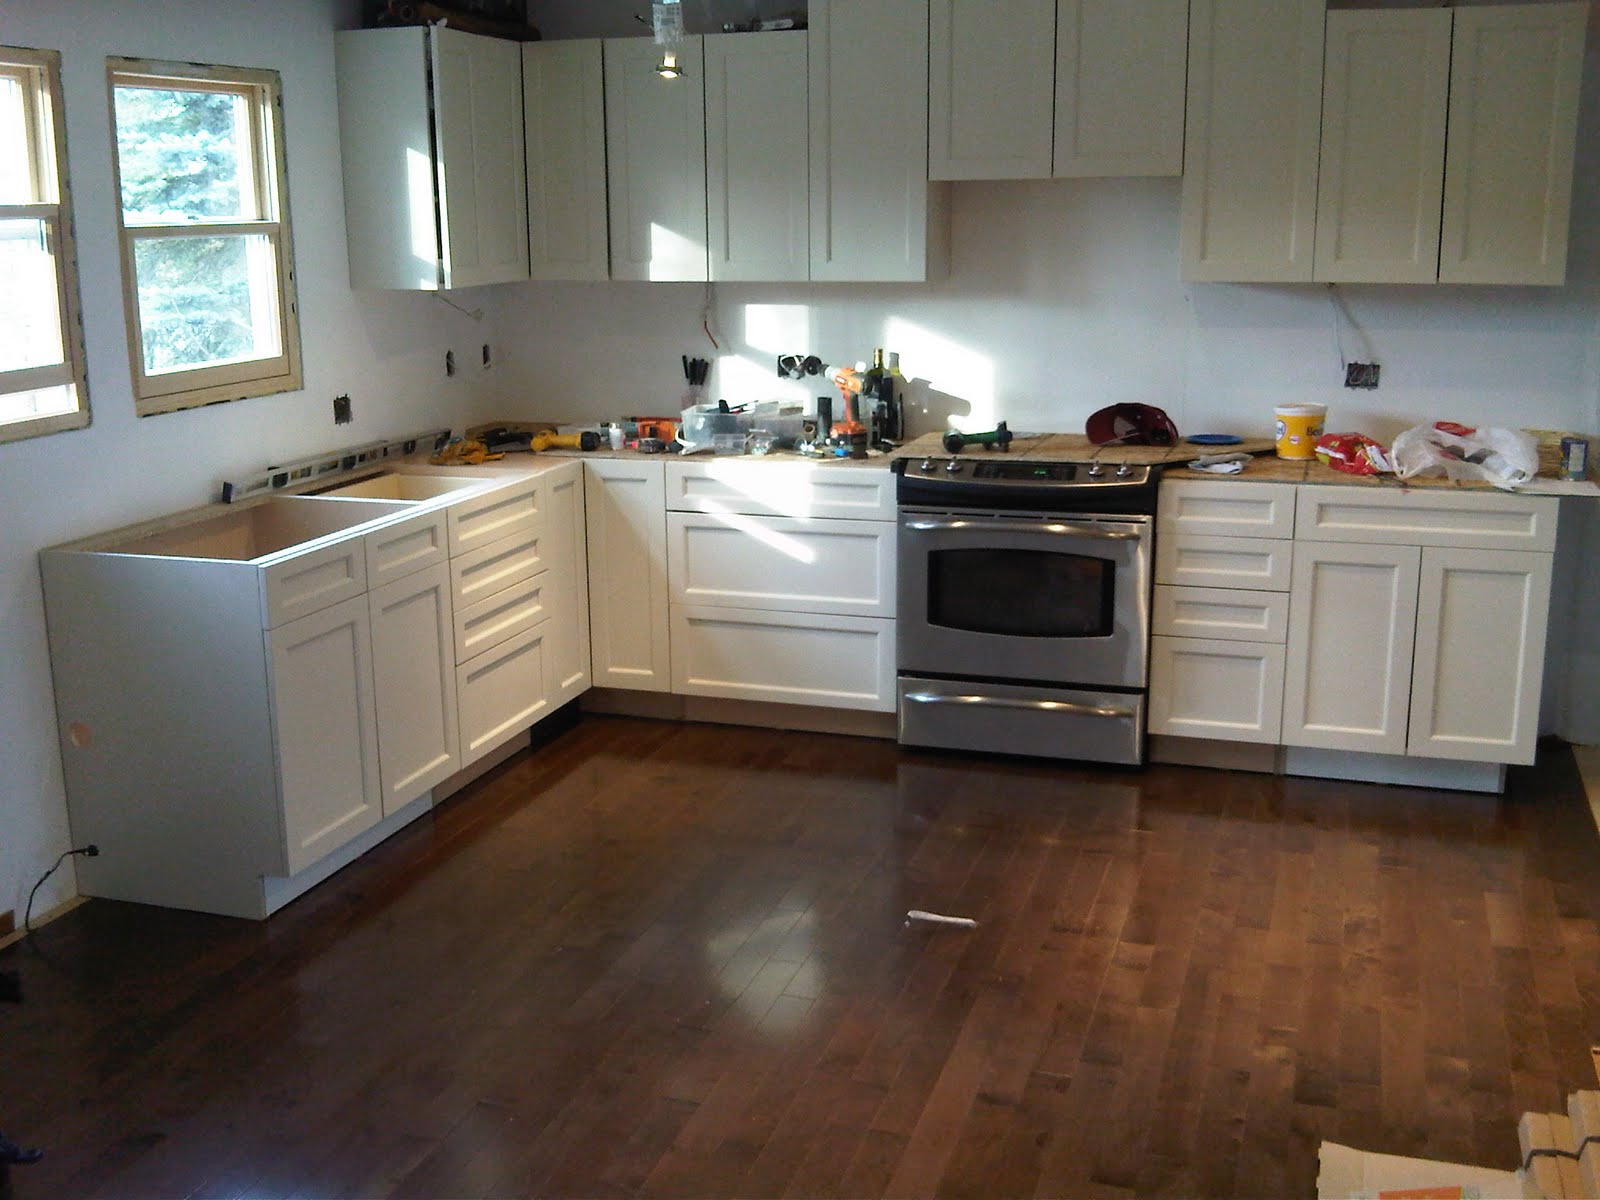
 In the last post all the units were fitted along with the island, as you can see in this first image. Once the island was securely fitted to the floor the dark wood casing was added, a nice contrast to the light cabinets on the main units.
 The next stage was to trial a wall covering, before the back splash was decided upon the wall was painted to give a good idea of how it could look with the chosen colour.
 In this last image for this post the counter tops have been fitted. We went with quartz rather than granite, quartz has a few benefits over granite. Firstly it is a little more hard wearing, you can place hot pots and pans without any issues, it does not require any maintenance or sealing, it is not at all porous so has better antibacterial properties and also it is a little more environmentally friendly. The cost is a little higher but not that much that it makes the decision a tough one. Another benefit is that you can get another section at a later date which matches your current selection.
Well I had great intentions of Blogging regularly, it worked well for a while but then sadly fell apart when things got busy.
That being said I recently bought a new Video camera, mainly to do some home movies particularly of Jamie at soccer but the camera has a neat "time lapse" feature. I am sure all have this feature now but its new to me!!
This is the first attempt at a little video editing and time lapse of the latest home project, I am sure there will be more to come.
B...
 In this first image you can see the first 8x4' floor board in place. I choose 3/4 OSP. Even though 5/8ths is good enough I like to add a little extra, this adds a little more stability and also allows for a hardwood floor in the future. Also note in this image the vapour / gas barrier. As this room is above the garage you must ensure that there is a full gas barrier to avoid any exhaust fumes from vehicles below, this also doubles as the vapour barrier. Don't forget it needs to be in the "Warm in winter" side of the structure hence placing it directly beneath the floor.
 This second image shows a little added structure to support the far wall, as the flooring 2x10's were placed either side of the existing 2x6's there was almost a 4" step from one side to the other, I wanted to ensure that the wall was well supported so I added these 2x4's every 16" to give the wall plenty of support. The wall would eventually partly support the roof, as with most roofs they sag a little in the middle, I wanted to make the walls fairly straight so later on I would jack the middle part of the roof up about an inch and a half, without these supports there was a risk of forcing the the floor to bow downwards.
 Once the floor was laid the next task was to start on the three knee walls. After the first one was installed I needed to add a referance line around the room so that they would all be square to the first.
 The final image in this post shows one of the side walls and the long end wall.
 When installing cabinets, its always a good idea to start with the upper cabinets and in a corner. Its much easier to handle the cabinets without having to lean over the base units.
 In this second image you can see a few more, hopefully, useful tips. They definitely were for me. Firstly use two levels, this allows you to keep an eye on the unit in both axis. Also make sure you secure them with clamps, if you don't they will fall off unless of course you have 3 pairs of hands, most people don't. For units above the range its a good idea to use an adjustable support bar, again with a clamp, this supports the unit allowing much easier securing when in place.
 The third image shows all the upper units fitted to the "stove" wall, hanging the doors takes seconds, thankfully these units came wit the quick release door hinges. This part of the project, wall units, takes a fairly short amount of time, many people have commented on the fact that I have installed a kitchen, that's the easy part, all the work is done behind the scenes! This part of the project only took around 2 hours.
 The first image for the second part of this post you can see the starting point for the base units. Again the same approach was taken, always begin with the corner unit. Take time to make sure that the units are level across the tops. I really took time to ensure they were as level both side to side and front to back. When the counter tops are installed you don't want them on a slant. The last thing you want is for your eggs to roll off onto the floor when cooking your breakfast!


 Unfortunately I don't have a good image of the wall between the house and the garage loft but what the previous owners had done was a definite no no.
 So the first part of this project was to have a damn good clean up to remove all the old, now damp insulation and soggy, mold invested ceiling tiles. Always take care with mold, seek advise if your not sure as it can be dangerous. My loft was well ventilated and with a mask and gloves I very carefully placed all the contaminated pieces in large plastic bags for disposal.
 In the next two images you can see a few of the joists added and the start of the insulation. Getting these 2x10 (16ft long) pieces of lumber into the loft space was hard work, there was very little space to move and you have to be very careful not to drop them onto the ceiling when putting them in place as they could easily fall through and end up in the garage. In total I used 22 joists, this part of the project was quite challenging more for the physical aspect than the technical difficulty. One thing to bear in mind when laying joists is the natural bend in all lengths of lumber. Firstly you should always have the bow facing upwards, over time they will tend to settle and if the bow is upwards they tend to settle to being straight.
 Another big tip is to have them placed in order of bow, to make sure that the joists of equal bow were next to each other I stacked them on top of each other in order to make sure that my floor wasn't up and down across its width. This may sound like overkill but when I measured the difference in bow from the best to the worst joist was over 1/2 inch. If the worst was placed adjacent to the best floor would feel very uneven, by having them staged removes any gross changes in height.
 In this post some of the exciting, well exciting for Claire, items start to happen. It is always a good sign when things start to be installed after spending weeks taking apart.
The first image shows the area, with my helper as always!!, almost ready to start laying the floor, some important things before the sub-floor goes down: -
 I started my floor in the middle of the room, this according to every text book and Internet article is the wrong place to start, but I had my reasons. if I started from the left had wall I would have to some how match the exact starting point for when they joined where the short stud wall split the kitchen and dining room, I didn't want to risk having them out of line as there would have been a gap in the next few rows after the stud wall (I can explain better if any doesn't understand, let me know?). I couldn't start on the right side as the step wasn't anywhere near finished and I would have had to tear out the temporary kitchen you can just see in the third image on the right.
 So I choose the middle, the only issue with this was that the two center rows would need to be back to back and consequently needed nailing on the back side of the pieces of wood and not through the tongues. I choose to also glue these two rows and not put the brown paper underneath. I felt comfortable taking this approach as this center row would be covered mostly by the island and dining table so the sight on nails wasn't an issue. And as mentioned in a previous post, hardwood floors become marked very quickly when you have kids and any sign of nails soon get lost!!!
 Our garage is a reasonably good size almost 21' x 27', with no rooms above it. On the face of it its a pretty straight forward task but not for the average handyman. The beauty of our house is that the roof line of the garage loft allows for a room to be added without any changes to the roof. This definitely makes the task a whole lot easier.


This first image again shows a starting point, not a great photograph unfortunately but it shows the original kitchen cabinets larder unit and door / window.


This next image was taken during the application of the spray foam, you can see where the door has been removed and window installed.

The final image for this post shows all the drywall fitted and mudded, you can also see the joists at the front of the photo, the original kitchen extended into the den which didn't make any sense at all, the joists have been cut back approx 18 inches to make the den a better size. Even though the kitchen was made smaller the new layout and removal of the wall between the kitchen and dining room made it feel much larger.
In the next post the easy stuff starts, new floor and kitchen cabinets!!
B...
 This first image (Same as the first post) you can see our starting point. On the surface it doesn't look too bad, the cabinets were made from a pretty good quality and the doors are as solid as you can get but they were not the right type, colour or layout. After removing the bulkhead and peninsular cabinet, I was surprised to see that there was no vapour barrier or adequate insulation between the house and the garage. Not a good starting point. The amount of cold air that was coming into the house was huge which made keeping the area warm almost impossible and potentially very dangerous should any car exhaust fumes leak in. One thing to note is that our house has a wood burning fire place so we do get a fair amount of negative pressure in the house which makes this problem even worse.
 This second image basically shows the wall prior to adding the insulation. To get this far was allot of work. All the electrical wiring had to be re-routed correctly, some of the old wiring was fed over some of the studs and there were a few crossed hot and neutrals. I did spend allot of time marking all the wires and making sure that I knew were all were fed from and to, once the spray foam was added I was glad I did it was worth the extra effort.


 When we moved into our new house, last summer, one thing I didn't realise was that the existing kitchen was not acceptable, and a new one had to be installed. You should always seek full clarification from your significant other before buying a house :o)
 Within a few days we ended up with what you see opposite, no floor, walls or ceiling.


